
Add drawings to clinical items
Use drawing qualifiers in clinical items to more accurately display conditions or procedures on preset clinical images.
Clinical items such as Exam;skin and Exam;breast can include clinical images.
-
In a relevant clinical item, such as Exam;skin, in
the Drawing qualifier, double-click the clinical
image.
-
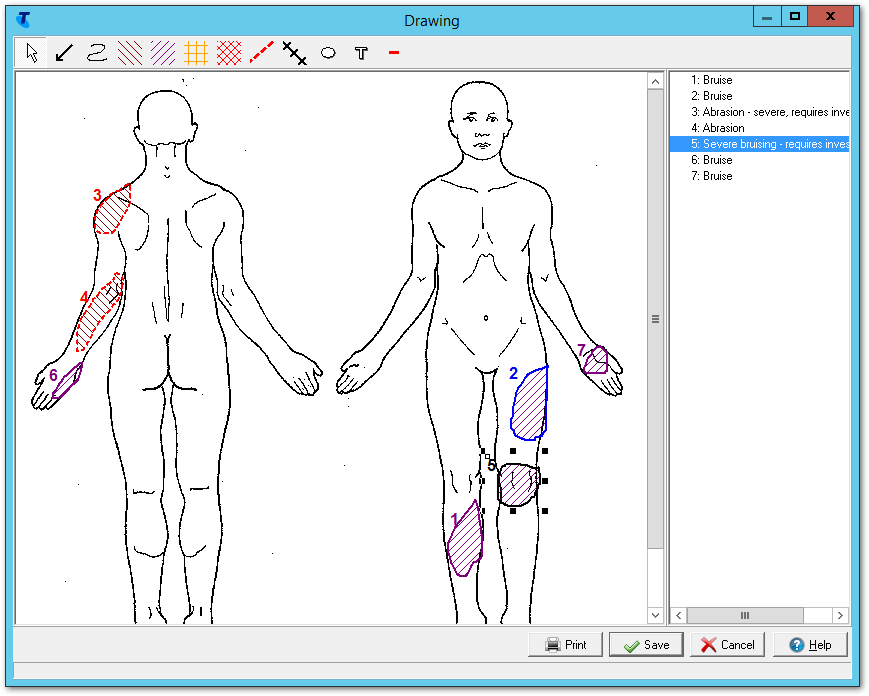
In the Drawing window, click a drawing tool and draw on
the image.
Use any of the following drawing tools to add clinical items of interest to the image:
 Pointer - use to identify a specific area
 Pen - use for freehand drawing
 Abrasion - use to draw an enclosed region and fill with a
pattern to identify an abrasion
Abrasion - use to draw an enclosed region and fill with a
pattern to identify an abrasion Bruise -use to draw an enclosed region and fill with a pattern
to identify a bruise
Bruise -use to draw an enclosed region and fill with a pattern
to identify a bruise Burn - use to draw an enclosed region and fill with a pattern to
identify a burn
Burn - use to draw an enclosed region and fill with a pattern to
identify a burn Pain - use to draw an enclosed region and fill with a pattern to
identify pain
Pain - use to draw an enclosed region and fill with a pattern to
identify pain Laceration - use to draw a region identifying a laceration
 Suture - use to draw a region identifying sutures
 Ellipse - use to draw an ellipse tool for any purpose
 Text - use to add text to the drawing. Typically, use with the
pen and pointer which will need further explanation. Edit the font
style, colour and size if required.
Text - use to add text to the drawing. Typically, use with the
pen and pointer which will need further explanation. Edit the font
style, colour and size if required.
Each addition to the drawing is numbered and listed in the key on the right.
-
A default annotation is added for each drawing object, identified by number. If
required, edit the annotation to provide more information regarding the object.
For example, you could explain the cause of a burn in the annotation:
- Either right-click a drawing element and select Edit Annotation, or in the key, double-click the required entry.
- In the Annotations window, edit the default annotation or add extra information.
-
If required, edit the outline colours and styles and interior pattern and
colour of the drawing object:
- Right-click a drawing element and select Edit Style.
- In the Brush properties window, edit the required attributes.
-
If required, to print the drawing click
 Print. If you print a drawing, all annotations
are printed.
Print. If you print a drawing, all annotations
are printed.
- Click Save.

If you printed the drawing, a report is displayed that includes patient information and information about the drawing qualifier and clinical item. The drawing is scaled to the page, and the annotations are printed in a key on a separate page.
If required, you can add the drawing to a letter. The drawing includes a key with callouts and any annotations you have added. For more information, see Writing letters and referrals.