
Running and uploading PMHC reports
Run the PMHC reports to generate a file containing data from the PMHC clinical items, which you can then upload to the PMHC portal.
Use the following reports to generate Microsoft Excel spreadsheets for submission to
the PHN:
For details of the program or the content of the items and for information relating to the upload, contact your local PHN.
Note: Some optional information is not captured, such as the year of birth of the
provider. Communicare V15.0 has a K10 assessment item, but the K5 will appear in
V15.1 and the SDQ at some later stage. If you already have a K5 or SDQ in
Communicare, contact Communicare Support for advice on export codes required
to ensure the reports find these items. Alternatively, if these assessments are done
on paper, edit the Excel spreadsheets directly – you only need to enter the final
score, not all the individual responses.
The PMHC portal accepts either an archive file containing CSV files or a Microsoft Excel spreadsheet.
Tip: If your clients have a postcode starting with 0,
such as 0872, use method 1. Microsoft Excel removes leading
zeroes so is not a good option.
To extract the PMHC data from Communicare, use either method 1 or method 2:
-
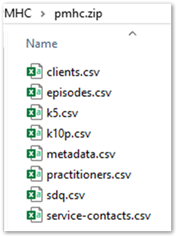
Method 1 - an archive file (.zip) containing comma
separated value (.csv) files:
-
For each report, run and in the report, click
 Advanced.
-
Repeat steps 1a-f for each of the eight PMHC reports.
-
For each report, run and in the report, click
-
Method 2 - a Microsoft Excel file:
-
For each report, run and in the report, click
 Export.
-
For each report, run and in the report, click
To upload the files to the PMHC portal, follow the instructions provided by PMHC.
Address any questions relating to accessing the PMHC portal and how to navigate the portal to your local Primary Health Network.
For questions about where the reports find the data they require, contact Communicare.